Each of the content creation tools at your disposal as a GoConqr user has its own particular uses. Course Builder lets you bring them all together, and do a whole lot more besides.

Depending on what kind of learner you are, the chances are that you have your own favourite GoConqr tool to use because it performs a particular function.
For example, Mind Maps are a great way for putting together a visual overview that helps simplify complex concepts; Flashcards are highly effective at helping to memorise key dates, quotes, facts or figures; while the GoConqr Quiz tool offers a rich variety of ways by which you can test your knowledge and consolidate your learning.
But while each tool has its own distinct merits, the best way to use them for a deeper learning experience is not to use each one separately, but to put them together.
And that is exactly what we have designed our new Course Builder feature to let you do.
Customising Your Course
For Revision
Let’s use an example. Say, for instance, you’re studying for an exam on a complex topic such as Shakespeare’s King Lear.
You read through the play and start creating study resources using GoConqr. You put some information on main themes into a Note; you outline key aspects of the language in a Mind Map; your put historical examples of the Elizabethan world into a Slide set and create a number of Quizzes to make sure you can test to see that you know all that’s important.
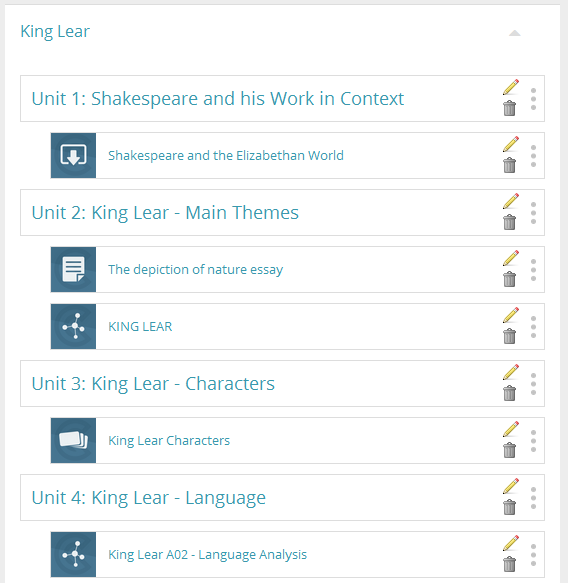
With Course Builder, you can quickly improve your revision revision by bringing all these resources together, and in a logical sequence you can access whenever and wherever you like.
For Teaching or Training
Or say you’re a trainer who’s created a number of orientation resources (including Slides, Mind Maps and so on) for new hires in your company. Course Builder is perfect for gathering all this relevant training material to a single, easy-to-access location.
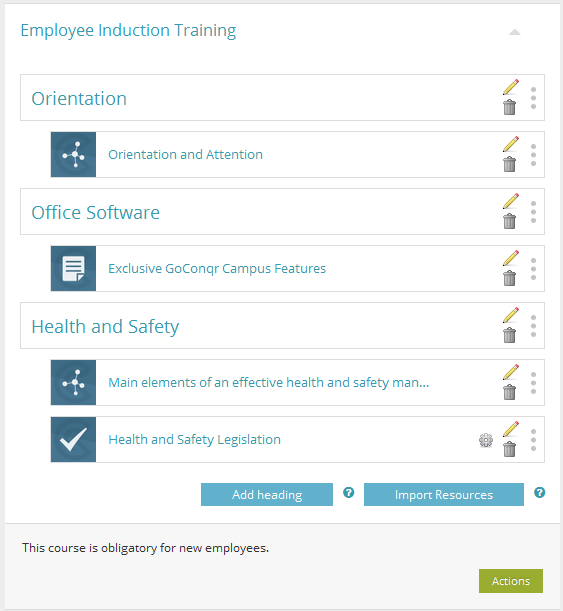
It also lets you create and control the sequence in which users interact with your learning or business courses online so that they progress along the path you’ve determined for them.
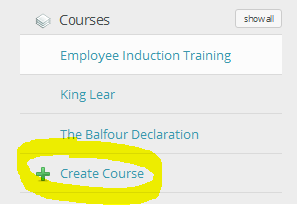
To enable sequential viewing, first select “Create Distance Learning Courses” from the left-hand side-panel of your dashboard.
Next, tick the option for sequential viewing.
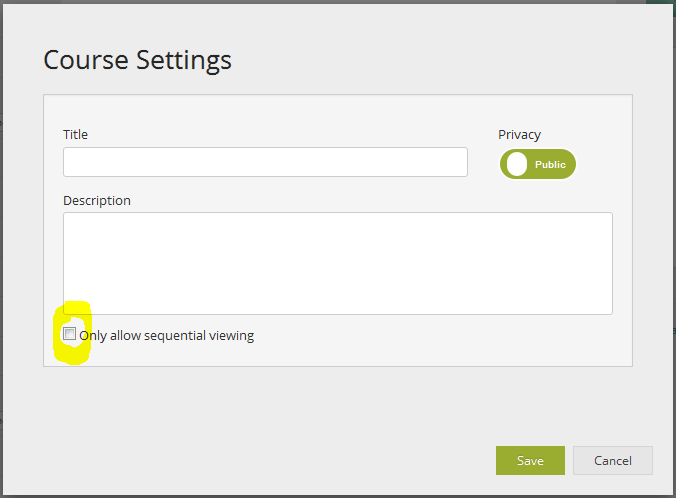
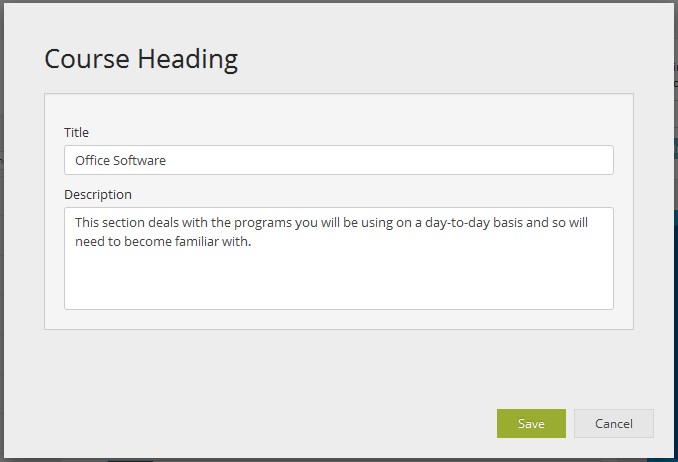
You can also add context to your distance learning courses by dividing it into sections or chapters and adding your own intros, comments and summaries to help users navigate and better understand the material you are presenting.
Sharing Your Course with Others
Once you have created learning or business courses online, the next step a training manager or teacher will want to take will be to share it with employees or students.
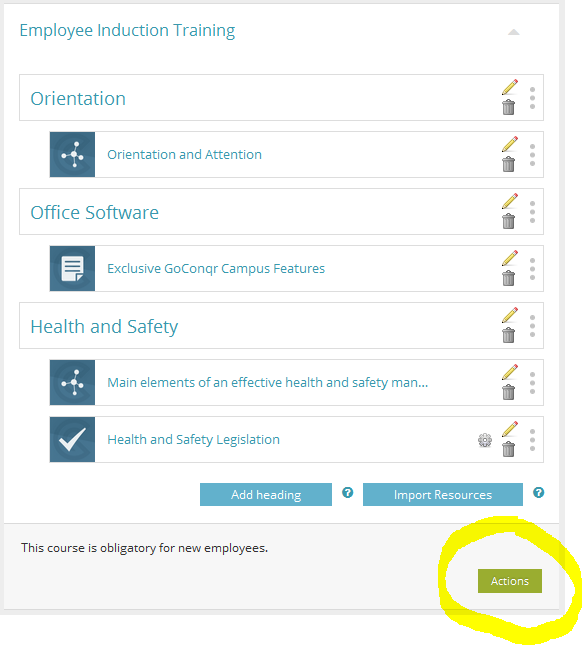
To do so, click on the “Actions” button at the bottom of the distance learning courses overview.
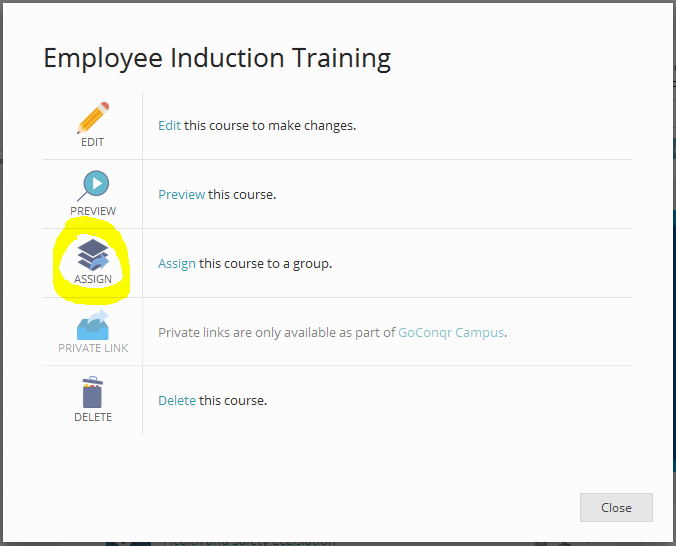
This will bring up a number of options, including “Edit”, which allows you to make changes to course headings, descriptions and sequence; and “Preview”, where you test how your distance learning courses will appear to users.
Below these you will find the “Assign” option.
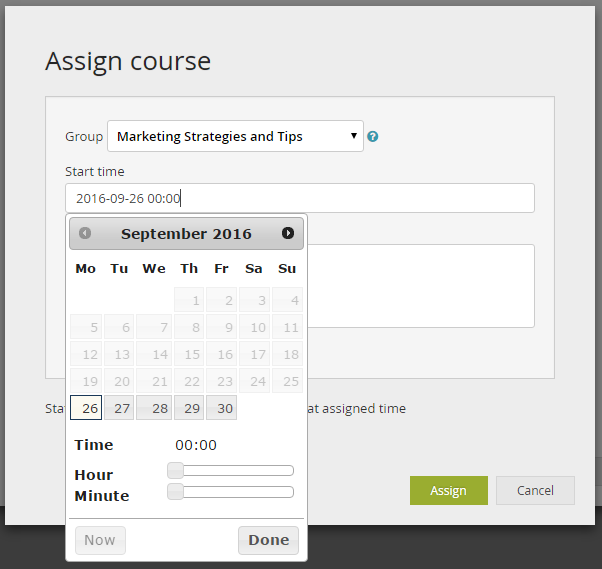
This lets you choose who you want to share your course with, select the time and date you want to share it, and add a description of your learning or business courses online. Once you are happy with your selections, click the “Assign” button.
Note: You can only assign distance learning courses to groups if you are a Group administrator. However, if you are not a Group administer it is possible to share a course within a group by posting the course URL.
Tracking and Analytics
If you are a GoConqr Campus user, you will also be able to access reports detailing users’ performances – either overall or segmented to show how they’re done in the different stages of the your course.
This will give you the insights you need to make any necessary amendments to your learning or business courses online content in order to meet the needs of your employees or students.
